




Our cofounder’s creek-side sauna.
We knew this sauna system when it was available only in Finland. Today, Sauna Marketplace cofounder Ben Burger owns and uses the TITAN and SaunaTrekker himself.
Since getting his set, Ben has been using it more than his indoor sauna. He brings it down to the creek for sauna rounds with natural cold plunges between them. That ability to take a stone-heated sauna to a favorite outdoor spot is what keeps him reaching for it.
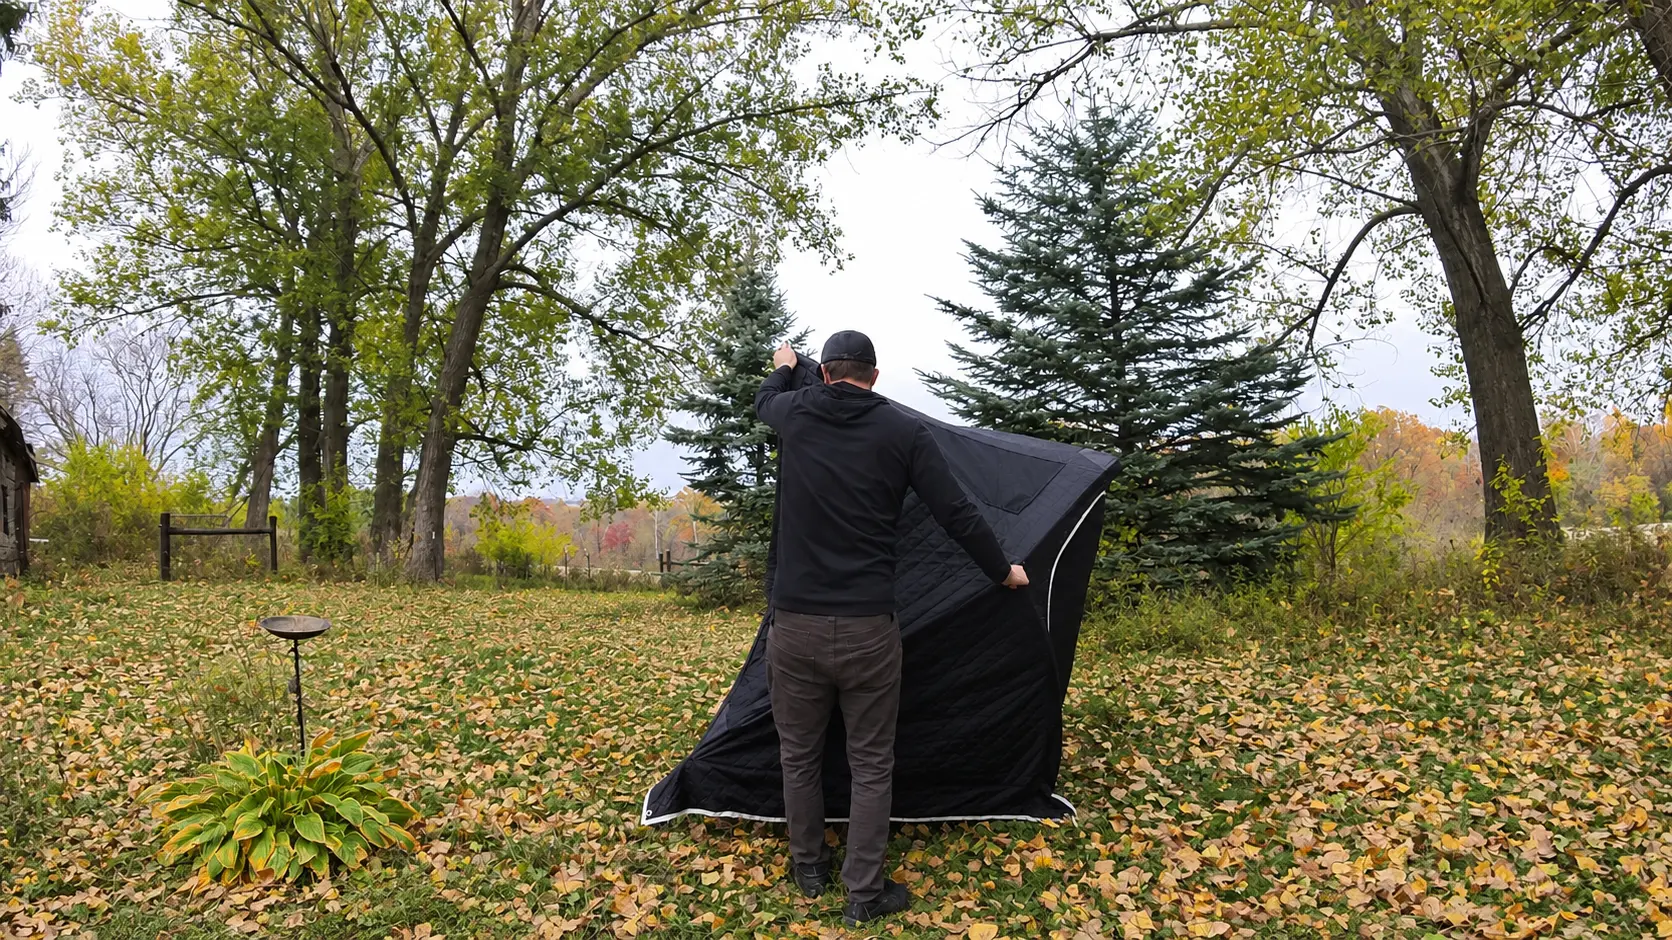
Our photographs below show the first unboxing and outdoor setup of the standard, four-person SaunaTrekker.
The frame stays attached to the shell. Opening the roof and wall hubs gives the tent its shape; stakes and storm lines secure it. That makes the tent straightforward to unpack, while heater placement, ventilation and the base remain separate parts of getting ready for a session.
 Enlarge +
Heat, fresh air & built-in protection
How chimney-free heat works.
Pair SaunaTrekker with TITAN for propane heat without a chimney or hardwired electricity. The tent’s factory vents are required for that setup. Here is how the heater and airflow work together.
01 / The burner
Propane combustion.
A gas flame needs oxygen. With adequate air and correct operation, propane combustion produces heat, water vapor and carbon dioxide. TITAN’s flueless design releases that heat into the sauna instead of sending it up a chimney.
The burner warms the heater and stones. Once hot, the stones also let you create löyly with small ladles of water.
 Enlarge +
02 / Natural ventilation
How air moves through the sauna.
Enter low
Outdoor air enters through the lower intake near the heater, supplying air for combustion.
Warm and rise
Air heated by the stove rises. The temperature difference drives natural air movement.
Exit high
Air leaves through the upper outlet to the outdoors as fresh air replaces it.
Keep that path open throughout heating and use. Natural ventilation is required; the TITAN manual does not recommend mechanical ventilation.
 Enlarge +
03 / Automatic gas shutoff
A safety backup built into the heater.
TITAN’s oxygen-depletion system (ODS) is designed to stop the gas supply if oxygen falls below its preset threshold. In this type of system, low oxygen changes the pilot flame; the thermocouple cools and the safety valve closes.
ODS supplements ventilation. It does not measure CO₂ or replace an open air path, correct installation, maintenance or supervision.
What about gases in the sauna?
Does chimney-free mean no carbon dioxide?
No. Burning propane produces carbon dioxide (CO₂) and water vapor. Continuous outdoor-air exchange carries combustion products out and replenishes the air. Never seal the sauna to retain heat. ODS is an oxygen-depletion safety device, not a CO₂ monitor.
How is carbon monoxide different from carbon dioxide?
Carbon monoxide (CO) is a separate, poisonous gas that can form when fuel burns improperly or ventilation is inadequate. Under normal operating conditions, TITAN is designed to avoid hazardous CO levels when the manual’s ventilation requirements are maintained. This does not mean zero CO or safe operation with blocked vents. Never leave the running heater unattended or sleep while it operates.
Use the airflow designed into your tent.
SaunaTrekker’s vents are factory positioned and sized. Put TITAN in the corner with the lower intake, and leave all factory openings unobstructed. Do not cover, modify or adjust them to hold in more heat. Remove the camping ground cover before heating.
Keep the propane cylinder upright and outside. Follow the required clearances and the complete installation instructions.
Portable sauna setup.
Open it without loose poles
The roof and wall frames stay integrated with the tent. Open the hubs, then anchor the structure with the supplied stakes and storm lines. The carry bag keeps the shelter together between trips.
Heat and löyly outdoors
Add TITAN and its 44 lb stone load for propane-powered sauna heat and water on hot stones, without firewood, wood ash, a chimney or hardwired electricity. The insulated walls and factory ventilation are designed around this heater.
Make room for your routine
Two covered windows give you light and privacy options. Add the folding two-level cedar bench for seating, or connect two standard tents to create separate sauna and changing spaces. Heater, stones, bench and connector are sold separately.
For TITAN, allow approximately 15–20 minutes for warm-up under suitable conditions. Weather, ventilation and the complete setup affect the time. A tent that has popped open still needs anchoring, safe heater placement and all required pre-use checks.
A compact room, with space planned around the heater.
- Capacity
- Up to 4 people
- Exterior · W × D × H
- 70.87 × 70.87 × 86.61 in
- Interior · W × D × H
- 70 × 70 × 78 in
- Windows
- 2 with covers
- Ventilation
- 1 lower intake + 1 upper outlet
- Heating
- TITAN SL1; sold separately
Allow for the heater and its clearances, the bench footprint and a clear entrance when deciding how many people you want to seat. The optional two-level cedar bench has a 60 × 16 in upper seat at 31.5 in high and a 47 × 16 in lower bench at 16 in high.
 Enlarge +
Standard SaunaTrekker
Choose the compact four-person model for a smaller group and footprint. This is the tent shown in our setup photographs.
SaunaTrekker XL
The XL is the six-person alternative, with more interior room and six windows. Compare the XL tent →
Two connected standard tents
The optional connector joins two standard SaunaTrekkers. It does not fit the XL. See the standard-tent connector →
Three layers, an integrated frame and fixed ventilation.
Weather-facing outer shell
A waterproof-coated 420D Oxford polyester outer layer surrounds the frame. Anchor the tent with the supplied stakes and storm lines.
Insulated interior
Polyester fiber fill sits between the outer shell and a 210D heat-reflective Oxford polyester lining. The door closes with a zipper; window covers let you control light and privacy.
Airflow for TITAN
One lower intake and one upper outlet establish the ventilation layout. Keep both open during heating and install TITAN at the lower-intake corner.
Open the tent. Then prepare it for heating.
1. Unpack and open
Remove the bag and securing strap. Check for twisted or overlapping poles. Pull the roof handle outward, then open each wall hub as shown in the setup manual.
2. Anchor the structure
Stake each corner and secure the supplied storm lines to the wall eyelets. Keep the entrance clear. Do not treat an unstaked pop-up frame as the finished setup.
3. Complete the heated setup
Remove the camping ground cover. Install TITAN on a stable noncombustible base in the lower-intake corner, arrange stones and seating, maintain clearances, and keep the propane cylinder outside.
Heater space: maintain 6 in at the sides and rear and 16 in in front of TITAN, measured from the outside of the stone basket. The Heat Shield does not reduce these tent distances. Never set the heater directly on grass or leave the camping ground cover underneath it.
Build a complete setup without guessing what is included.
In the tent bag
- Insulated tent and integrated frame
- Ground stakes and storm lines
- Carry bag
- Camping ground cover (remove for sauna use)
- Setup instructions
For a sauna session
- TITAN SL1 propane heater
- Two 33 lb boxes of rounded stones; load at most 44 lb
- Separate LP propane cylinder
- Noncombustible heater base
- Suitable seating; folding cedar bench sold separately
Optional accessories
- TITAN Water Tank
- Additional alder heater guards; TITAN includes one
- TITAN Heat Shield; no reduction in tent clearances
- Connector for two standard tents
The package builder above adds your selected components as separate cart items. Check the selected products total; the tent-only price is not the cost of a complete heated setup.
A room you can pack away between visits.
The tent ships in a 55 × 20 × 20 in carton with a listed shipping weight of 50 lb. Those are shipping measurements, not a measured packed-bag size or the weight of a complete heater-and-bench setup.
After shutdown, let TITAN cool for at least 30 minutes before handling and use the supplied gloves. Remove the stakes, close the tent’s windows and openings, then collapse the hubs and gather the corners in the manual’s sequence. Do not force the frame while folding.
Plan transport for the tent, heater, stones, cylinder, bench and base. Account for each component when loading your vehicle.
 Enlarge +
SaunaTrekker questions, answered.
What is included in the tent price?
The insulated tent with integrated frame, ground stakes, storm lines, carry bag, camping ground cover and setup instructions. TITAN, stones, propane cylinder and seating are separate.
Which heater can I use?
The SaunaTrekker is designed for the SaunaLife TITAN SL1. Do not substitute a wood stove, electric heater or another fuel-burning heater. TITAN’s installation and operating instructions apply alongside the tent setup instructions.
Can four adults fit comfortably?
SaunaLife rates the standard tent for up to four people. Its interior is 70 × 70 × 78 in before allowing for the heater, clearances, seating and access. Fewer people provide more room; compare the XL if extra space matters.
Can I keep the supplied ground cover in during sauna?
No. The internal ground cover is for camping use only. Remove it before every sauna session. TITAN needs its own stable, level, noncombustible base and must not sit directly on grass.
Can I close the vents to make it hotter?
No. Keep both factory ventilation openings fully open and unobstructed whenever TITAN operates. Put the heater in the corner with the lower intake and keep the cylinder outside.
Does it need tools to open?
The roof and wall frames are integrated, so there are no loose poles to assemble. Open each hub in the manual’s sequence, then use the supplied stakes and storm lines. A tent that has popped open is not yet a complete, ready-to-heat installation.
Will the connector fit the XL?
No. The Tent Connector joins two standard SaunaTrekker tents. It does not fit SaunaTrekker XL.
Can I sleep in it while the heater is running?
No. Never sleep in the tent or leave it unattended while TITAN is operating. Follow the heater shutdown and cooling instructions before packing or changing uses.
What warranty applies?
Use the current SaunaLife warranty linked below and ask us to confirm the tent’s applicable coverage and exclusions. Do not assume a warranty term for a wood sauna kit automatically applies to a fabric tent.
Keep both manuals with your setup.
Read the complete instructions before assembly, installation or use. Keep the tent and heater manuals together.
No reviews of this product yet
Bought this one? Yours would be the first. Every rating goes through the same check before it appears.
Write a reviewWrite a review
Planning guides: Delivery and installation checklist
 Prebuilt
 Brushes, Whisks and Body Care
 Vents