
When NOT To Use A Sauna Vapor Barrier Like Bubble Foil Insulation

Adding a vapor barrier to a wall is like wearing plastic bags for socks. There are times when it will keep the wall (or feet) drier, but it will usually make things worse.
Buildings Do Not Lie, Henry Gifford
Thinking about adding a sauna vapor barrier, directly inside the cedar? Consider your entire wall assembly first to avoid a costly mistake.
While every home and sauna is different, there is one rule that must be followed to avoid mold and rotting wood. Moisture has to be able to ‘breathe’ in both directions away from any non-permeable surface or vapor barrier.
THE RULE OF ONE VAPOR BARRIER: UNLESS THEY ARE IN DIRECT CONTACT, THERE SHOULD NEVER BE MORE THAN ONE VAPOR BARRIER IN A WALL ASSEMBLY
What’s A Vapor Barrier?
A vapor barrier is any non-permeable surface that prevents both water and water vapor from moving through the material. Think about it this way, if water sits on this surface or material, would it sit there until it evaporates, or eventually make its way through? u003cbru003eu003cbru003eMost housewraps like Tyvek block air but not water vapor. We call those them air barriers. u003cbru003eu003cbru003eVapor barriers include the following: Asphalt underlayment, rigid foam insulation, glass, plastic vapor barriers, metal, radiant barriers, aluminum foil vapor barriers, and bubble foil insulation.
One vapor barrier, which could consist of several layers of non-permeable materials, is excellent to have toward the outside of a wall assembly. The best place for a vapor barrier is between the plywood and the exterior cladding.
A vapor barrier placed towards the exterior of a sauna will keep the structural parts of the wall dry and happy.
HOWEVER, when another vapor barrier like bubble foil insulation or aluminum sheets are added on the inside wall of the sauna (typically right before the cedar), we are asking for trouble.
If both barriers are taped and well sealed, you may not know you have a problem for years. But as soon as moisture can penetrate the interior or exterior vapor barriers, you WILL have moisture in the wall assembly the cannot escape – perfect conditions for mold growth.
We want our saunas to last 100 years like traditional timber built saunas, but we want them to heat efficiently. Additionally, we can’t cut down a small old growth forest for log saunas.
Luckily, if we follow a few unbreakable rules we can build efficient saunas that have high r-value, good airflow, and will never rot or mold. The most important is the ‘Single Vapor Barrier Rule’.
Testing Sauna Vapor Barrier Wall Assemblies
The best way to show how this rule works, and how it prevents moisture from being trapped in your wall is to look at a few examples.
1Standard Stick Frame Outdoor SaunaCladding -> Tyvek -> Plywood -> 2x4s w/ Fiberglass -> Reflective Foil Insulation -> Cedar
The most common type of outdoor sauna is this basic stick frame structure, built like a shed or house with 1980s building codes.
This wall assembly has issues but will not trap moisture because there is only one non-permeable vapor barrier, the reflective foil insulation.
How to make this assembly fail: Add a non-permeable material (like rigid foam insulation) to the exterior wall, and now you will have moisture trapped between the exterior foam and the interior bubble insulation. This wall WILL eventually fail.
How to improve this assembly: Use an adhesive housewrap like Henry Blueskin which self-seals nail penetrations. Use Mineral Wool instead of fiberglass which degrades over time and is terrible if it gets wet.
2Barrel SaunasSingle layer of 2x lumber
Barrel saunas are the leakiest and easiest to dry out barrel saunas on the market. If water gets into the wall, it can move in either direction to dry out.
Even with a metal roof on the top half of the sauna, the wall assembly test is easily passed because the wall can dry from either side of the metal.
To be honest, a barrel sauna without a roof would give a building scientist reasons to be concerned. They have very low r-value and no drainage plane. It’s really best to keep them out of the elements if possible.
So while barrel saunas may loose a lot of heat and leak without a metal roof, the wall assembly breathes well enough to overcome potential moisture problems.
3Log SaunaSingle layer wall assembly of stacked logs
Log saunas are the other single material sauna type that passes the permeability test all day long.
Like barrel saunas, log saunas have a drainage plane problem, where it’s relatively easy for moisture to enter the wall assembly. However, as long as water isn’t collecting and sitting anywhere (usually the first row), the wall assembly should dry out.
Again, they require a lot of energy to heat, but the leakiness and absence of any vapor barrier make them strong candidates to last a long time.
Log saunas can dry out in both directions, and properly maintained can last over 100 years.
4Sauna TentSingle layer of Canvas
The sauna tent is another easy one. It’s a single layer of canvas, which is not a vapor barrier. The sauna tent will have no problem drying out after getting wet.
6Standard Basement SaunaConcrete -> interior living space -> drywall -> 2×4 wall -> vapor barrier -> cedar
Basement saunas can be a problem if they share a wall that already has a vapor barrier on the exterior, like a layer of rigid foam against the concrete slab.
However, most DIY basement saunas are built like seperate rooms, often completely separated from exterior walls.
These enclosures should be drained, and will have no problem with a bubble foil vapor barrier that is standard in basement sauna construction.
Just make sure you know the wall assembly of any exterior wall the basement sauna shares, as that’s where you may get into trouble. If you’re not sure, use the rockwool insulation method with beveled 2×6, as described in the 100 Year Sauna Design below.
5The 100 Year Saunacladding -> air gap -> rigid foam -> adhesive air barrier -> plywood -> 2×4 with mineral wool -> cedar
Here it is, the perfect structure, and not that much more expensive to build a sauna this way.
The cladding will be attached to horizontal 1x3s, which are attached with long screws through the rigid foam and through the plywood into the 2x4s.
Mineral wood insulation can be used instead of rigid foam, using horizontal bats before applying the final cladding.

An adhesive housewrap should be applied to the plywood, instead of a staple-on housewraps like Tyvek, which tears and is not an effective air barrier.
Either way, the 2×4 structure should use mineral wool insulation instead of fiberglass. Mineral wool is the ideal sauna insulation for several reasons. It can safely reach 1200 degrees F, it sheds water, rodents hate it, and it will not off-gas.
Just make sure you’re using a formaldehyde-free mineral wool like Owens Corning Thermafiber.
Since we will attach our finish cedar directly to the 2×4 wall without a vapor barrier to act as a drainage plane, we do have one extra detail to make sure water does not collect at the base of our 2×4 wall.
The bottom plate of your 2×4 wall should be made with a 2×6 with a bevel slope. We use treated wood for the bottom plate, but if you are worried about chemicals you can use a standard 2×6 with ZIP tape applied.

So now we have our interior wall built with treated or taped 2×6 base plate, beveled in.
We can insulate the cavity with mineral wool, and install our finish cedar directly to the 2x4s without a sauna vapor barrier.
If any water gets through the cedar, with will not penetrate the mineral wool and eventually make its way down to the beveled 2×6 and onto the finish floor.
Mineral wool will also regulate the humidity in the wall, and keep the studs dry.

This is a wall assembly that will last 100 years, as long as the roof is maintained and doing its job.
When Should You NOT Use a Sauna Vapor Barrier
Do not use a vapor barrier inside your sauna if the wall uses rigid foam, spray foam, plastic vapor barriers, or asphalt underlayment. It will eventually trap moisture between the barriers causing mold, and eventual wall failure.
When Do Vapor Barriers Work in a Sauna?
Vapor barriers are effective when they are in direct contact with any vapor barriers in the wall assembly. They also need an air cavity of at least half an inch to be effective. An example of an effective wall assembly with a vapor barrier is in a shipping container. From outside to inside, Steel -u003e Rigid Foam -u003e Vapor Barrier -u003e Half Inch Air Gap -u003e 2×4 wall with mineral wool insulation in cavities -u003e Cedar
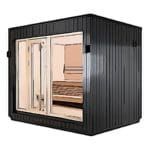 Prebuilt
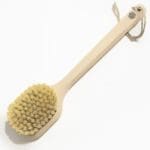 Sauna Brushes
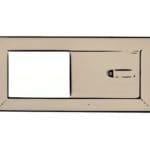 Vents
Vents