


")


1×4 Thermo-Spruce STS4 Coverage
Thermally modified thermo-spruce 1×4 STS4 T&G wall cladding by Thermory.
Each board shows 3.1″ of usable face coverage. One bundle = 6 boards ≈ 1.55 ft across. Stocked lengths (LF): 4.9, 5.9, 6.8, 7.8, 8.8, 9.8. No subtraction for doors/small windows. Over 9.8′: we cut in half & double (center seam).
Rectangular Sauna
Length × Width × Height. Use +/- or type inches for perfect sizing.
—
in
Tip: Shift = 6″
3′7′16′
—
in
Tip: Shift = 6″
3′7′16′
—
in
Tip: Shift = 6″
6′8′10′
Thermory wood is perfect, but shipping and installation isn't. We recommend adding 10%.
Per Room Result — —
Runs ≤ 9.8′: single pieces. Longer runs: center seam (bundles doubled).
Sauna Wood Calculator
Plan each wall separately, then the ceiling. Use +/- or type inches.
Wall — This Wall
Thermory wood is perfect, but shipping and installation isn't. We recommend adding 10%.
—
in
Shift = 6″
2′7′16′
—
in
Shift = 6″
6′8′10′
Per Wall — —
Over 9.8′ horizontally → we “cut in half & double” (center seam). Try vertical to avoid seams.
Ceiling — This Ceiling
Thermory wood is perfect, but shipping and installation isn't. We recommend adding 10%.
—
in
Shift = 6″
3′7′16′
—
in
Shift = 6″
3′7′16′
Per Ceiling — —
Surfaces
| Surface | Board length | Bundles (raw) | |
|---|---|---|---|
| Add walls or a room to list surfaces here. | |||
Bundles to Order — By Stock Length (rounded per length)
| Stock length (LF — bundle of 6) | Bundles to order | Raw bundles |
|---|---|---|
| Add walls or a room to see the breakdown. | ||
Grand total: 0 bundles · 0.0 raw bundles before rounding.
Order Line Items (Title / Description / Quantity)
| Title | Description | Quantity (bundles) | |
|---|---|---|---|
| Add walls or a room to see line items. | |||
Your One Stop Sauna Shop


Select options
This product has multiple variants. The options may be chosen on the product page
Select options
This product has multiple variants. The options may be chosen on the product page
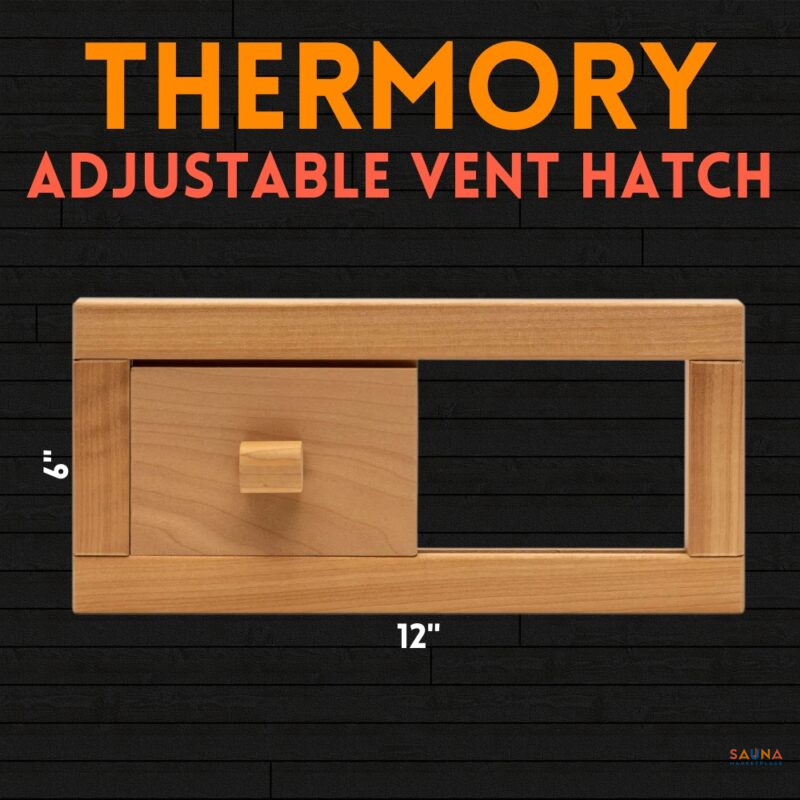
Thermory Adjustable Air Vent Hatch in Thermally Modified Aspen
Rated 5.00 out of 5
$69.00 – $84.00Price range: $69.00 through $84.00
Select options
This product has multiple variants. The options may be chosen on the product page
Thermory Air Vent in Thermally Modified Aspen Wood
$55.00 – $84.00Price range: $55.00 through $84.00

Installation
When building a sauna, make sure the installation work is performed with quality and precision to make the wood last longer. Wood as a natural material requires regular maintenance to preserve its properties.
Always check the wall panels immediately on receipt to identify any transport damage. Never install a defective product. When installed, the product is deemed to be of acceptable quality.
Storage
Best practice is to store your wall paneling in the same room where they will be installed for a few weeks before installation to allow the wood to acclimatize to the temperature and humidity conditions in the room.
Store the wall paneling on a flat surface, openly stacked and above the floor surface, for example on joists. Make sure that joists would be at least 11.8 inches to avoid bending. This will enable air movement between the panels.
Wall paneling must be stored at the same temperature at which they are going to be installed. The ideal storage temperature is 59–72 °F.
If there is a radiant heater or other heat source in the room used for storing the wall paneling, make sure the humidity level does not get too high and the temperature does not exceed 77 °F.
Wall paneling must be stored in unopened packages. Remove the heat-shrinking film immediately before installation.
Prep for Installation
Sauna wall paneling are installed as part of living area finishing works. When planning the order of construction work, keep in mind the wall paneling does not tolerate changes in humidity during construction.
Make sure sufficient ventilation is provided in the sauna room.
Make sure you have enough material, as there may be slight differences in shade between production batches.
The approximate material loss varies between 5-10% depending on the length for wall paneling.
Any wet operations must be performed before installing the wall paneling. Performing wet operations after the wall paneling have been installed will cause the paneling to absorb moisture and swell.
Installing Thermory Sauna Wall Cladding
Open several packages so you can better match your wall paneling.
Thermory and Sauna Marketplace recommend using a staple gun and stainless steel clips for installing the wall paneling.
First install the underlay battens to afix the wall paneling to. The battens must be at least 0.79” thick and 1.8” wide. If the wall paneling is going to be placed horizontally, install the battens vertically. Vertical wall paneling, however, requires horizontal battens. The battens must ensure air movement behind the wall paneling across the entire extent of the paneling.
Make sure the battens are straight and level before installing the wall paneling. The recommended batten spacing is 15.7”. The batten spacing must not exceed 23.6”.
When installing wall paneling horizontally on adjacent walls of a room, start installing the paneling row by row on all walls at once, circling the room one row at a time. This way you can align the ends of the paneling with precision in the corners.


When installed horizontally, the paneling must be installed from top to bottom.
Fix with staples from the groove side for both vertical and horizontal installations. Position the panels with the tongue side up and groove side down for horizontal installation.
When installing the wall paneling vertically, leave a gap of at least 0.4” between the adjacent corner or board for the first and last panels. Cover the gap with a corner moulding later.
Check the installation precision of the paneling with a level or measuring tool after every three rows.
Fix the wall paneling to the battens with staples, we recommend the use of a staple gun. Finishing nails are not suitable for fixing the paneling.
Set the staple penetration depth so the clips will not protrude out of the paneling surface and penetrate too deep and damage the wood surface. Make sure the wall paneling with hidden fixings are installed down to the bottom.
Check with a level that the first row of the paneling is installed straight, as installation imprecision will increase for the following rows. Check the installation precision with a level at least after every three rows.


Ceiling Panelling
If you also want to install the paneling boards on the ceiling, start with the ceiling and cover the walls after that. Installation is similar to installing the horizontal wall paneling. Leave a sufficient airing gap between the first row of paneling and the adjacent wall and between the last row of paneling and the wall.
Special Considerations
Make sure the paneling is installed straight. Perform control measurements from time to time with a direction rope or laser.
Make sure to add support for sauna benches behind the panelling. The weight of the benches must not be carried out by the paneling.
Make sure to fasten the paneling with the proper tools for this particular purpose.
Thermowood Treatment
To prolong the life of your sauna, we recommend treating all wooden surfaces with a breathable wood protector. The protector will protect against dirt, moisture, facilitate cleaning, and enliven the wood surface.
Wipe the wooden parts clean of dust, clean them with a sauna detergent, or other detergent suitable for wooden surfaces, and allow to dry. For finishing, the surface must be clean and dry.
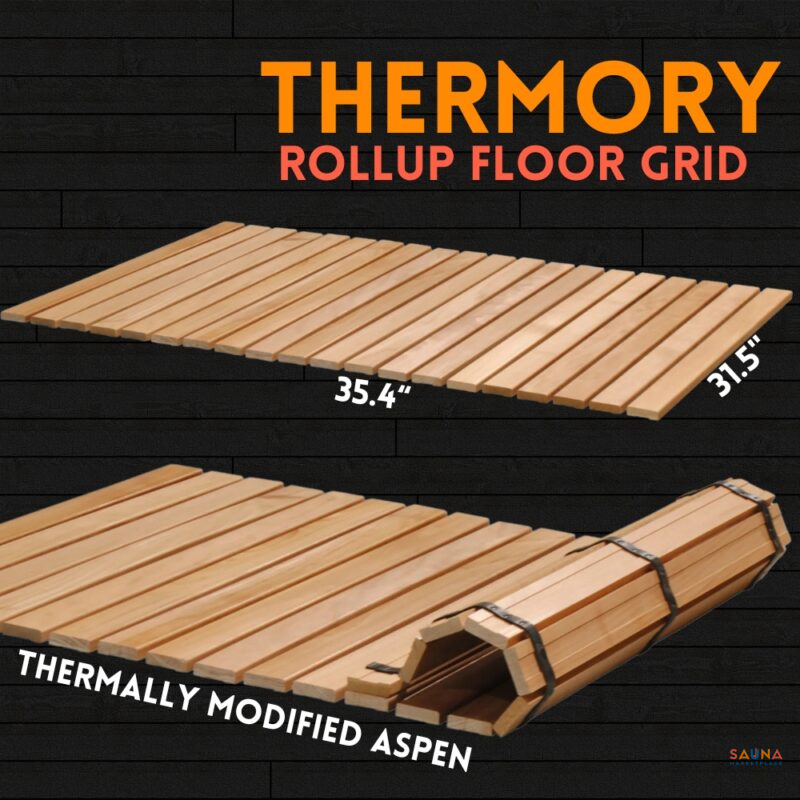
Treat the walls and floor grid of your sauna with sauna wax or another suitable coating.
Be sure before finishing, that the paint is suitable for sauna conditions. All finishing has to be done according to paint manufacturer’s instructions!
Thermowood Tips
Thermory’s range of sauna products includes a number of wood products having undergone medium and intensive thermal modification. These products require special care in order to preserve the characteristic properties of thermowood.
Handle packages and products with care during installation. Do not scratch the wooden surface or drag boards on top of each other. Thermowood has a characteristic scent that will weaken over time but never completely disappear.
The scent will disperse faster when letting the sauna heat for a long time and air it at the same time. You can reduce the characteristic scent of thermowood by treating the wood with a suitable wood wax or maintenance product.
Avoid washing untreated thermowood with water as it will strengthen the scent. Any complaints about the quality or scent of the wood must be submitted before sawing, installing, or treating the wood.

Need a Quick And Easy Materials Quote?
Just bring your dimensions, choose your style, and we'll take it from there.
Thermory Thermally Modified Spruce STS4 1x4 & Thermo‑Spruce 5/4 x 4 — Sauna Bench & Cladding FAQ
Jump to a question
- Q: What is Thermory sauna wood?
- Q: How is Thermory made?
- Q: Why choose Thermory over untreated cedar or spruce?
- Q: Does Thermory get hot to the touch?
- Q: Are knots a problem in Thermory?
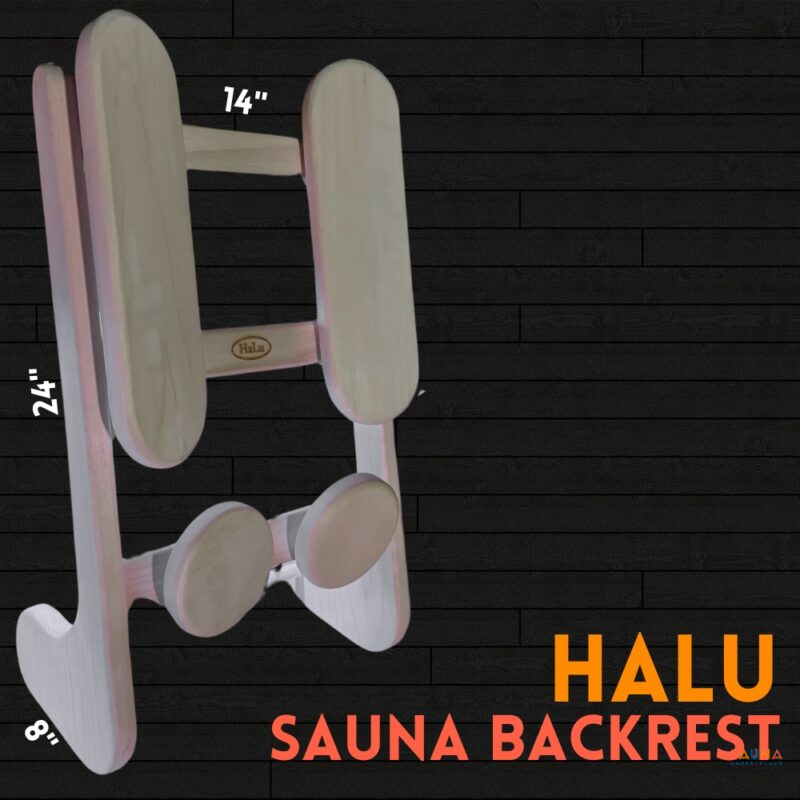
- Q: Can I use Thermory for benches and backrests?
- Q: How does Thermory handle humidity changes?
- Q: Is Thermory sustainable?
- Q: How does Thermory compare to cedar in a commercial sauna?
- Q: Can I use Thermory outdoors (e.g., fencing or cladding around cold plunges)?
- Q: What fasteners should I use?
- Q: Do I need an air gap behind Thermory wall cladding in the sauna?
- Q: Does Thermory require finishing inside the sauna?
- Q: What profiles and lengths are available?
- Q: How does color age over time?
- Q: Any layout tips when designing with Thermory?
- Q: Is the process chemical-free?
- Q: Recommended humidity/temperature ranges?
- Q: Can Thermory be combined with other materials?
- Q: Who is Thermory best for?
Q: What is Thermory sauna wood? ▸
A: Thermory is thermally modified wood engineered for high heat and humidity. It’s dimensionally stable, low-conductivity (won’t feel burning hot), resin-free, and ideal for benches, walls, and ceilings.
Q: How is Thermory made? ▸
A: Through a high-heat thermal modification process using only heat and steam—no chemicals. Wood is dried, modified at high temperature, then reconditioned to a stable moisture content for long-term performance.
Q: Why choose Thermory over untreated cedar or spruce? ▸
A: Greater dimensional stability (less cupping/twisting), no resin bleed, lower thermal conductivity for comfort, enhanced durability, and rich, consistent color through the board.
Q: Does Thermory get hot to the touch? ▸
A: Less than typical softwoods. Its low thermal conductivity means benches and backrests feel more comfortable at sauna temps.
Q: Are knots a problem in Thermory? ▸
A: No—when the knots are sound, thermal modification yields uniform performance across the board. Knots also add natural character without creating hot spots.
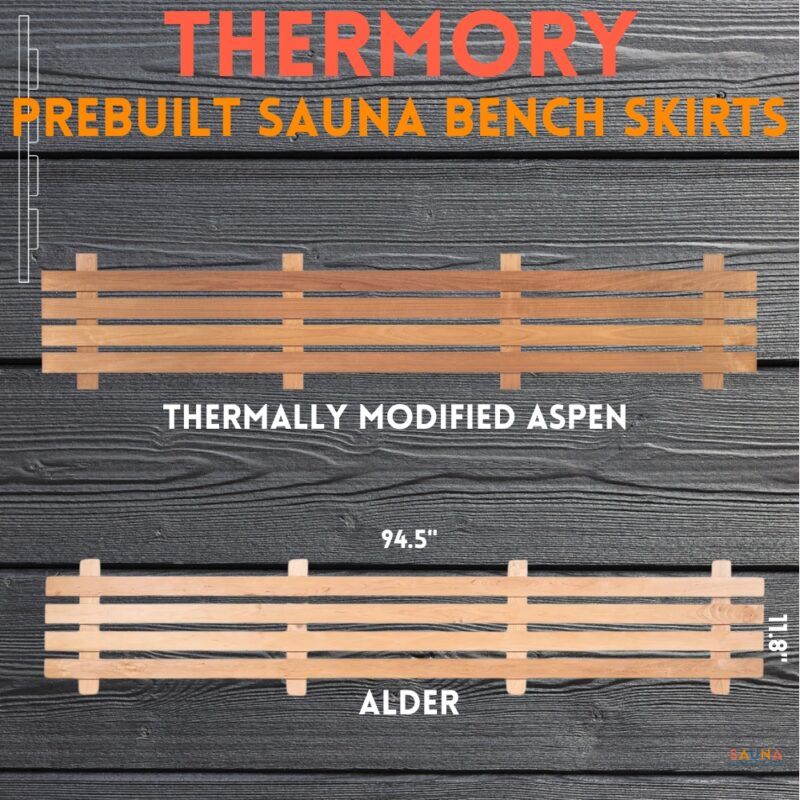
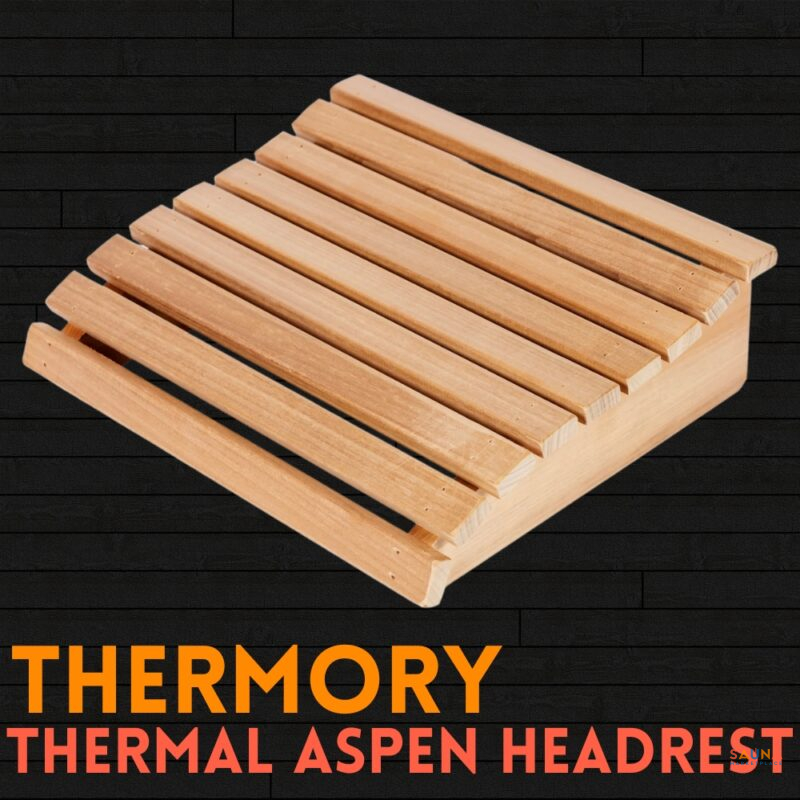
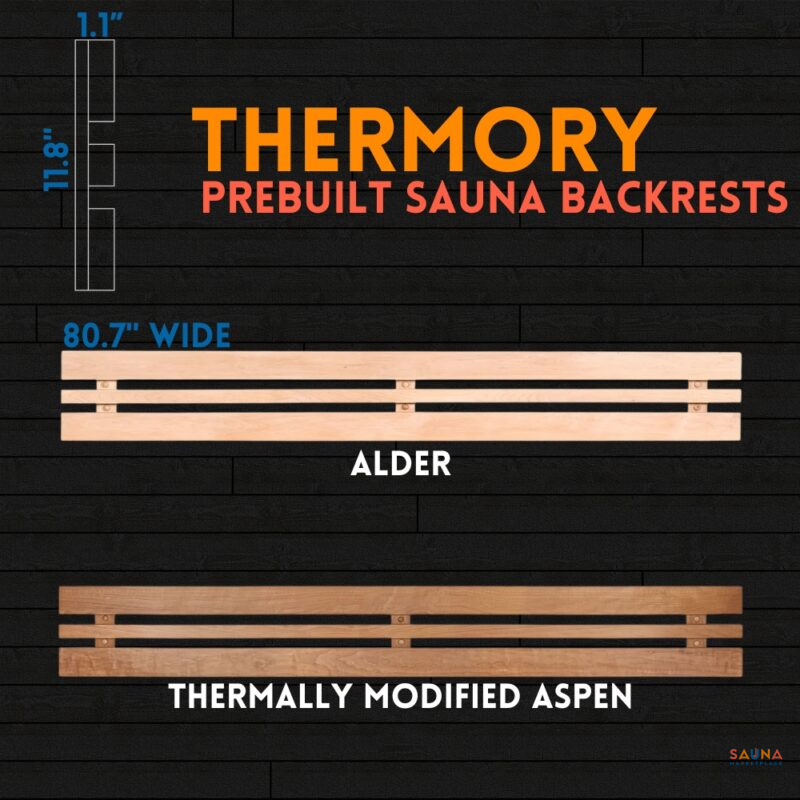
Q: Can I use Thermory for benches and backrests? ▸
A: Yes. It’s commonly used for benches, backrests, and wall/ceiling cladding. Select profiles with smooth surfaces and appropriate thickness for comfort and strength.
Q: How does Thermory handle humidity changes? ▸
A: Excellent dimensional stability reduces movement under extreme hot/cold and wet/dry cycling common in saunas.
Q: Is Thermory sustainable? ▸
A: Yes. It uses responsibly sourced wood and a modification process with heat and steam only. Wood stores carbon and avoids tropical hardwoods and chemical treatments.
Q: How does Thermory compare to cedar in a commercial sauna? ▸
A: In heavy use, Thermory tends to stay straighter with fewer splits or cupping, maintaining tight joints and a premium look over time.
Q: Can I use Thermory outdoors (e.g., fencing or cladding around cold plunges)? ▸
A: Yes. It’s suitable for exterior applications. Follow local codes for decking slip ratings; some projects use composite decking and Thermory for vertical/horizontal surfaces.
Q: What fasteners should I use? ▸
A: Stainless steel fasteners. Avoid plain steel to prevent staining. Pre-drill where needed and follow profile-specific guidance.
Q: Do I need an air gap behind Thermory wall cladding in the sauna? ▸
A: Yes. Provide ventilation behind decorative surfaces to manage heat and moisture and extend service life.
Q: Does Thermory require finishing inside the sauna? ▸
A: Many installations leave it unfinished for a natural, low-maintenance look. If finishing, use sauna-safe products and follow manufacturer guidance.
Q: What profiles and lengths are available? ▸
A: Multiple widths and profiles, often in longer, consistent lengths that reduce seams and waste. Ask Sauna Marketplace for current stock.
Q: How does color age over time? ▸
A: Thermory has a rich, uniform color from the thermal process. Indoors it stays warm-toned; outdoors it can weather to a silver-gray patina if left unfinished.
Q: Any layout tips when designing with Thermory? ▸
A: Mix narrow and wide profiles for visual rhythm, maintain proper bench heights relative to the heater, and plan circulation/cleanability—especially in commercial settings.
Q: Is the process chemical-free? ▸
A: Yes. Thermal modification uses only heat and steam to enhance durability and stability.
Q: Recommended humidity/temperature ranges? ▸
A: Works across traditional sauna ranges (typically 70–100°C / 158–212°F). Its stability and comfort shine at higher temps and under frequent löyly.
Q: Can Thermory be combined with other materials? ▸
A: Absolutely—pairs well with stone, metal, and glass for biophilic, modern designs while keeping tactile warmth where bodies contact surfaces.
Q: Who is Thermory best for? ▸
A: Homeowners wanting a premium, low-maintenance sauna interior, and commercial operators needing durability, stability, and a consistent aesthetic under heavy use.
 Prebuilt
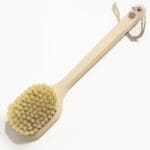 Sauna Brushes
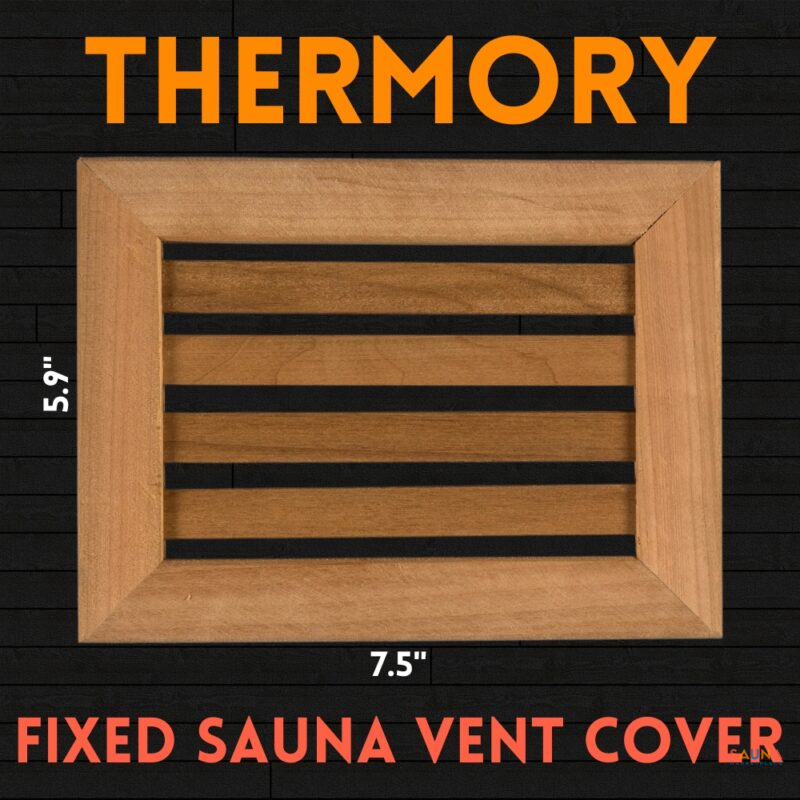
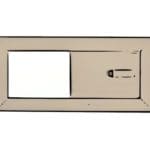 Vents
Vents