
")

")


The Ultimate Multi-Sensory Sauna Experience
This is as good as it gets folks! AirCube Space embodies the perfect fusion of contemporary design and sustainable craftsmanship. This thoughtfully designed structure seamlessly integrates into the serene surroundings of gardens or poolside locations, offering an oasis of tranquility. Crafted with meticulous precision and premium materials, it guarantees both longevity and elegance. The tiered L-Bench seating paired with a Saunum heater and good ventilation make this one of the best performing saunas on the market. The incorporation of sustainable wood enhances the sauna experience, emphasizing our commitment to eco-friendliness. The AirCube Space stands as a symbol of opulence and eco-consciousness, providing a stylish escape that effortlessly harmonizes form and function.From the Founder

Specifications:
- Interior Materials: Thermo-Aspen
- Exterior Materials: Thermo-Spruce
- Interior Dimensions: 57″D x 94.7″W x 74″H (4′ 9″D x 7′ 10.7″W x 6′ 2″H)
- Exterior Dimensions: 82.7″D x 110″W x 97.9″H (6′ 10.7″D x 9′ 2″W x 8′ 1.9″H)
- Window Glass Thickness: 0.16″ (0.01′)
- Window Glass Type: Double, Tempered
- Door: Self-Closing Door, Lock Included
- Front Wall: Clear Glass Windows and Door with Wooden Frames
- Bench: I-Shaped
- Interior Lights: LED
- Exterior Lights: LED
- Bluetooth Speakers: Yes
- Weight: 3637 lbs
- Luxury Sauna Cabin with Changing Room
- Upper and Lower Benches
- Floor Grate
- Bluetooth Speakers
- Pre-Wired LED Lighting System
- Installation Instructions

Installation requirements
The base or foundation for Sauna must be leveled and stable. Sauna must be at least 3 inches higher from the surrounding ground. All base beams must have a support under them.

Transport
Sauna is packed into protective OSB box. Do not disassemble the box before the sauna is in the final location. Sauna can be lifted from above with crane:

Protective OSB box disassembling
Dismantle the protective OSB box before final assembly. OSB boards are fastened with small screws covered with round stickers. The OSB boards, including the screw cover stickers, are painted black. The stickers prevent paint from getting into the screw heads and the screws are much easier to find.
Disassembling steps:
1. Remove stickers from the boards
2. Unscrew the boards with a power screwdriver
3. Remove the OSB boards and stack them on a level surface
4. Make sure that the supports of the boards do not come loose and fall down when loosening the screws
5. Once all the boards around the sauna have been removed, you can start dismantling the board supports at the top and bottom of the sauna
6. At the top are OSB strips with battens that are attached to the top with screws
7. The lower part of the boards is supported with timber. These are fastened with longer screws
8. Board supports taken off; the final assembly process can be started.


Final Assembly
See manual for more detail, wiring instructions, and warranty.
 Prebuilt
 Sauna Brushes
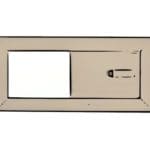 Vents
Vents